SAFETY AND ORIENTATION: HANDGUN
Handgun Equipment
It should be emphasized that complex and expensive modifications are not needed to start IPSC shooting. Most pistols out-of-the-box are quite adequate and most competitors strive to reach the limits of even a box stock standard pistol.
Changes and modifications can always be made as you need them. Don’t let yourself get caught up by the current fads and fashion. Competitors may enter any one Division depending on the style of firearm they use.
Nothing is more important than reliability. A reliable government model 1911 with standard sights and a standard trigger pull that functions 100% will win every time over a full-house race gun that doesn’t work. If the handgun functions correctly with your ammo then all is well. If not, your first concern is to make the handgun reliable.
Modifications which improve accuracy are good sights and a good trigger. Modifications which increase comfort, control, handling, and speed are items like beavertails, extended magazine releases, checkering, extended thumb safeties, enlarged magazine wells, etc.
Power Factor
Major and Minor factor are the two power factors floors recognized in IPSC. The power factor of a firearm is calculated using the formula of Bullet Weight (grains) times Velocity (feet/second) divided by 1000.
IPSC Handgun Divisions
The dominant pistol that was used in IPSC when it was first started was the Colt 1911 in .45 ACP. Over the years, as firearm technology and calibres improved, the choice for the competitor has increased. Now there are many different models and manufacturers of firearms used in IPSC. The 1911 style of firearm still makes up a large segment of the equipment that competitors use.
It is common practice for most competitors to have their pistols modified to suit their personal needs. Make sure that you check the rulebook to determine what modifications are allowed in each Division.
To be successful in IPSC competition you need to have a firearm that is reliable. It is strongly recommended to have a qualified gunsmith do any or all modifications to a firearm that involve the internal workings.
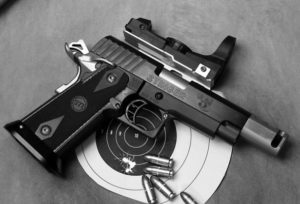
Open Division
- Optic/electronic sights are permitted
- Ports/compensators permitted
- No minimum trigger pull
- No maximum size of firearm
- No restrictions on holster position
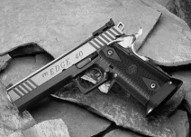
Standard Division
- No optic/electronic sights are permitted
- No ports/compensators permitted
- Minimum calibre for major 10mm/.40
- No minimum trigger pull
- Restrictions on holster positions
- Must fit wholly within the confines of the IPSC box
Classic Division
- No optic/electronic sights are permitted
- No ports/compensators permitted
- No minimum trigger pull
- Restrictions on holster positions
- Must fit wholly within the confines of the IPSC box
- Must be based on and visibly resemble the classic 1911-genre design
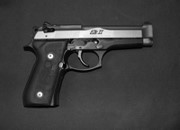
Production Division
- No optic/electronic sights are permitted
- No ports/compensators permitted
- Minimum trigger pull 2.27 kg (5lbs)
- Restrictions on holster position
- Firearm must be approved by IPSC
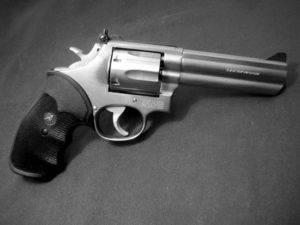
Revolver Division
- No optic/electronic sights are permitted
- No ports/compensators permitted
- No maximum size of firearm
* Refer to the rulebook appendix for the complete requirements for each Division.
Magazines/Speedloaders
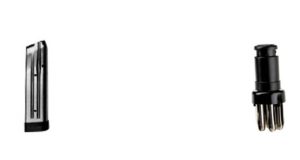
A competitor will need a minimum of five magazines, or six speedloaders (more is better). Magazines and speedloaders are the heart of a firearm and without good quality, properly cared for magazines or speedloaders the firearm will malfunction sooner or later. All the magazines should drop easily when the magazine catch is depressed.
When buying spare magazines or speedloaders purchase the best ones that are available. Aftermarket magazines usually come with better features such as extra round capacity, larger base pads, quick releases etc. Check the rulebook to determine what extra features are allowed for each Division.
Ammunition
The majority of IPSC competitors load their own ammunition. The primary reason for this is that the cost savings are significant and the ammunition can be tuned to the firearm. This will allow the firearm to perform at its maximum potential. Extreme care must always be taken in the reloading of ammunition. It is not necessary to load ammunition beyond safe levels. All that is required is to achieve the necessary power factor.
When loading for competition it is essential to use the best components. Reliability is the key factor, for even the most expensive firearm will not function properly if it is fed sub-standard ammunition.
If you decide to load your own ammunition, it is strongly recommended that you purchase or have access to a chronograph. A chronograph is used to measure the speed a bullet is travelling. This will allow you to calculate your power factor. In most competitions, it is required that the ammunition is chronographed to determine if the ammunition is Major or Minor.
Belt, Holsters, Magazine Pouches
A well-designed belt is a necessity. It will aid a competitor in the draw and allow consistent access to competitor’s firearm and magazines.
The belt must be securely fastened at hip level. The belt should be stiff enough to hold the holster and magazine pouches in the same position at all times.
There are many different holster and pouch manufacturers. Whatever holster you choose it should be constructed in such a manner that it will retain the firearm correctly during vigorous activities yet allow you an unimpeded draw. The holster must cover the trigger guard and keep the firearm close to the competitor’s body.
The holster should be designed so that the competitor can obtain a firm grip on the firearm with the strong hand without moving it in the holster. If possible, it is recommended that competitors try on a number of different holster designs to determine which one suits them best.
Magazine pouches are worn on the belt usually on the opposite side of the holster. The pouches must hold the magazines securely yet allow the competitor unimpeded access.
Pouches should be cut low enough to ensure that a proper grip can be obtained on the magazine. Most competitors wear a minimum of three pouches on their belt.
There are individual rules for each Division in regards to holster and equipment. Please refer to the rulebook for more information.
Other Related Equipment
A good shooting bag will allow you to carry the necessary accessories, ammunition, etc. to the range. It is recommended that it have compartments that will keep items separate.
Items that should be included in your range bag would be eye and hearing protection, cleaning equipment, lubricant, spare parts, rag or towel, scoring overlays, and current rulebook.
When going to practice, other items may aid you in training. These include but are not limited to: targets, target patches, target stands, staple gun, chronograph, and timer.
Uncasing is when an athlete wants to remove a firearm from a carry case. When uncasing a firearm you should know which direction the firearm is pointing when the case is closed. That way when the case is opened the firearm will be pointing in the designated safe direction. This can only be done in the designated safety area or under the direct supervision of a Range Officer. It is always recommended to verify the firearm is unloaded.
Firearm Safety Check
It may be necessary or desirable to check the firearm for safety. This can be done at a Safety Area or while under the direct supervision of a Range Officer. To check a semi-automatic firearm do the following. While pointing the firearm in a safe direction verify that both the magazine well and chamber are empty. Close the slide. Pointing the firearm in a safe direction lower the hammer by pressing the trigger.
Manual Safety
With the hammer cocked and the safety on, press the trigger. The hammer should not drop.
With the hammer cocked and the safety on, press the trigger. Release the trigger and take the safety down to the off position. The hammer should remain cocked.
Half Cock Notch
Cock the hammer. Then holding the hammer, press the trigger, and release the hammer slowly. It should stop in the half cock position.
Disconnector
Check by cocking the hammer, and then open the slide, approximately 1/16″ or 1.5mm. Press the trigger. The hammer should remain cocked.
Revolver
While pointing the firearm in a safe direction, open the cylinder and verify that the firearm is not loaded. Close the cylinder. Always pointing the firearm in a safe direction, pull the trigger and cycle through the cylinder.
Hammer bar or block
With the cylinder open, cock the hammer. Holding the hammer, press the trigger and ease the hammer forward about 1/8″ or 3mm then release the trigger and ease the hammer down. The firing pin should not protrude through the frame.
Timing
The cylinder should not have excess rotation when the hammer is cocked. The chamber should be held in the correct alignment to the barrel. Slowly press the trigger double action, and just prior to the hammer falling, you should detect the cylinder bolt locking into the recesses on the cylinder. When locked, and the trigger fully pulled to the rear, there should be very little rotational movement.
Course Outline
The aim of the course is introduce new members to the exciting world of IPSC shooting.
To provide the student with the basic knowledge of gun handling skills and the required safety.
To measure individual skill levels to ensure that all students have the basic level of proficiency skills and to qualify new competitors as holster proficient.
Safety is always the primary concern.
Range Safety and Safety Areas
In addition to the basic safety rules, there are further rules for safety. These procedural safety rules involve safe gun-handling and common sense.
Once holstered handguns may not under any circumstances, be handled in any fashion outside the Safety Area without the express authorization of a Range Officer.
The uncasing and casing of the firearm must always take place at the Safety Area.
The handling of ammunition in any Safety Area is strictly prohibited.
Pistols are carried in the holster from stage to stage. They are always unloaded with the hammer down and no magazine inserted.
Eye and ear protection must be worn at all times while on the range whether shooting or not.
Range Commands and Procedures
The following are the basic commands and procedures for loading and unloading.
- “Load and make ready”
- “Are you ready?”
- “Standby”
- “If you are finished, unload and show clear”
- “If clear, hammer down, holster”
- “Range is clear”
Load and Make Ready
On the command of the Range Officer “Load and Make Ready” the competitor is on the firing line facing downrange.
- Unholsters the pistol.
- Immediately points it down range with the strong hand on the grip and the trigger finger well outside the trigger guard.
- Inserts a magazine containing only one round with the weak hand.
- Locks the elbow, with the arm extended, muzzle pointed downrange.
- Turns the pistol slightly horizontal (toward the weak side).
- Grasps the slide between the thumb of the weak hand and index finger using the rearmost slide serrations.
- With a push/pull motion assertively pulls back the slide all the way and releases it so that the cartridge in the magazine is chambered, always pointing down range.
- Immediately applies the safety.
- Removes the empty magazine and stores in a pocket or drops it (it really shouldn’t be put back in a magazine pouch where it could be later grabbed by mistake).
- Inserts a fully charged magazine, all the time keeping the trigger finger well outside the trigger guard.
- Holsters the pistol, always with the safety applied.
- The competitor now has a pistol in the holster which is cocked and locked with the safety on and loaded to full capacity (at all times the trigger finger is kept out of the trigger guard).
Are you Ready?
After loading and assuming the start position, the Ranger Officer will ask “Are you ready?” If you are ready you do not have to respond to this question. If you are not ready, indicate by saying, “not ready” in a loud clear voice.
Standby
Stand by is the command to the competitor that the start signal will be forthcoming. This signal normally is the signal from the timer, the appearance of a target or some other form of visible signal.
If You are Finished, Unload and Show Clear
Following the command of the Range Officer “If You are Finished, Unload and Show Clear” the competitors faces downrange.
Pistol
- Point the pistol down range with the strong hand and the trigger finger well outside of the trigger guard.
- Remove the magazine.
- Drop the magazine or put it somewhere other than a magazine pouch. Do not try to hold the magazine in the other hand.
- Move the safety off.
- Extend the arm, pointing the pistol always down range.
- With the other hand, pinch the rear slide serrations with thumb and first finger.
- Pull the slide back sharply to eject the chambered live round onto the ground.
- Hold the slide open until Range Officer inspects the firearm by locking slide back.
This is done by turning slightly sideways and with the pistol always pointing down range, cup the weak hand on the slide, making sure never to pass the hand in front of the muzzle, then shift the right hand so that the thumb is under the slide-lock and exerting a slight upward pressure, rack the slide rearwards with a push/pull movement until the slide locks back into position.
The competitor then stands for inspection, facing down range with pistol pointing straight down range, the trigger finger always well outside the trigger guard, magazine out, slide locked back, and chamber exposed to view for Range Officer inspection.
Revolver
- Take the finger out of the trigger guard.
- Press the cylinder latch, open, and dump the cartridges on the ground.
- Continue to face down range with the cylinder open for inspection, always with the trigger finger well outside the trigger guard. The muzzle always pointed straight downrange.
If Clear, Hammer Down, Holster
This is the command after the Range Officer inspects the firearm making sure that there is no magazine in the magazine well and no cartridge in the chamber. Always with the trigger finger well outside the trigger guard.
- With the slide locked back, extend the pistol to arms length and apply the pinch grip at the back of the slide.
- Let the slide down easily, retaining the pinch grip until the action is closed.
- With the firearm always pointing straight down range, press the trigger so that the hammer falls.
If, through inadvertence, there is a cartridge in the chamber, there will be a discharge down range in a safe direction. It should be stressed that the hammer must be dropped by pressing the trigger so that if there is a cartridge in the chamber, it will discharge. This will ensure that there is no possibility the pistol will be holstered with a live cartridge in the chamber.
Holster the empty pistol (always be careful with muzzle direction, never point the muzzle back to find the holster). Keep the muzzle down range and bring the pistol back until the muzzle will drop into the holster in a forward motion and insert into the holster.
Range Is Clear
When the Range Officer issues the command Range is Clear, it is safe to move and others to proceed down range.
Shooting Basics
The Stance
Should be standing relaxed, natural and comfortable. Many people feel more stable and comfortable with strong side foot dropped back a few inches in a slight boxing type of stance. Experiment, find the stance that feels natural and without conscious effort. This will allow you to achieve consistency in your draw.
The Isosceles Stance is one of the most popular stances that you will see used in IPSC. The competitor starts facing the target feet shoulder width apart, standing naturally erect. Both hands grip the firearm and are pushed straight out towards the target. A slight bend at each elbow may be preferred if the competitor is more comfortable and can handle the recoil of the firearm. The back, hips, and feet are perpendicular to the target. The competitor should be in a straight line with the target without any indications of twisting. To better handle the recoil of the firearm, the competitor can lean into the firearm. This would put more weight on the balls of the feet. When engaging multiple targets, the competitor pivots at the hips, keeping the eye and hand relationship intact.
The Modified Isosceles is the other most commonly used stance in our sport. It is similar to the Isosceles in that the competitor stands facing directly at the target. The feet are shoulder width apart, with the weak side foot being about 10 cm in front of the strong foot. The arms are outstretched equally towards the target. The positioning of the feet in this stance gives the competitor more strength to handle the recoil of the firearm.
The Grip and the Draw
This is the sequence of events from the pistol in the holster to the first shot fired. It is best described in a step-by-step sequence.

The Draw
The competitor’s strong hand grasps the grip of the pistol by coming up from the bottom. The second, third and fourth fingers come up on the stock with the trigger finger well away from the trigger guard. The thumb should rest on top of the safety. The safety remains on at all times during the draw.
The other hand moves forward of the center of the stomach with the fingers extended and together and the palm vertical. The palm is about 6” out from the stomach. The position of the weak hand is in line with the push of the pistol towards the target.
Clearing the Holster
The pistol is drawn from the holster, always with the safety on and the trigger finger well clear of the trigger guard. When the muzzle clears the holster, it should immediately point downrange.
The Grip
The competitor commences to push the pistol toward the target where the two hands come together onto the grip. The hands come together with the weak hand fingers over the strong hand gripping the stock. The weak hand thumb on top or along side the strong hand thumb.
After the two hands come together on the way to the target the safety is wiped off with the strong hand thumb. The trigger finger remains always outside of the trigger guard.
The majority of IPSC competitions are freestyle, which allows the competitor to use a two handed grip on the firearm. The strong hand will grip the firearm as high as possible. The barrel, bones of the wrist, and the forearm should be inline. The three gripping fingers should apply uniform pressure on the front strap of the pistol. The pressure applied by the three fingers on the front strap should be resisted by equal pressure from the palm of the hand applied to the backstrap. There should be no lateral pressure applied to the firearm. If the pressure applied is not uniform, it can affect the accuracy of your shooting.
It is recommend that the thumb of the strong hand rest on top of the safety. The thumb should still remain straight. The safety can then act as a type of thumb rest. This technique will give you better steering control of the firearm. The supporting hand wraps around the strong hand, with the fingers wrapping over the fingers, parallel to each other.
When shooting with a two handed grip, the supporting hand applies the pressure in the grip and the strong hand applies less pressure in order to maintain dexterity. The grip on the pistol should be tight enough to hold the firearm securely but not so tight that it causes the competitor’s hands to shake.
The Sight
The push out to the target continues. The trigger finger comes into the trigger guard and the competitor is still looking at the target.
The movement to the target is continued to the line of sight. The finger comes onto the trigger. The competitor changes focus from the target onto the front sight for the flash sight picture, presses the trigger for the surprise break always focusing on the front sight.
When these steps are put together smoothly the result is a definite push out from the holster to the target, not an upwards swinging motion which would go up past the target. With practice, the competitor will have the sights on target and will only have to confirm this as the trigger is pressed.
The strong arm should be fully extended but slightly unlocked at the elbow. Try for it to be in same position every time. The head and shoulders should remain erect and motionless. The support arm should be slightly more bent at the elbow with a slight pulling back effect.
Sight Alignment and Trigger Control
The pad of the finger should press the trigger, not by the tip or at the first joint. The pad of the finger has the best combination of sensitivity and strength and therefore gives the best control over the trigger press. The trigger finger should be placed on the center of the trigger face, both vertically and horizontally.
The trigger must be pressed straight back, with the pressure being uniform and uninterrupted until the shot goes off. If pressure is applied in any other direction or is executed in an abrupt manner, it can cause the firearm to come off target.
As in any type of shooting, sight alignment and trigger control play a major role in accuracy. Because of the element of speed, IPSC competitors must learn and understand the concept of the acceptable sight picture for the shot required.
A five yard sight picture is much different from a twenty-five yard sight picture. The competitor must learn through practice what is an acceptable sight picture for each type of shot.
Good trigger control is keeping the trigger finger independent of grip. The power of the grip should be in your weak hand to allow the strong hand to press the trigger easier. The best place on the trigger is the center of pad on first joint on trigger and the press should be straight back. The best way to learn good trigger control is by dry firing without any magazine or ammo and removing the firing pin is recommended.
Your trigger finger is the primary safety and the only safety that you can trust as any other safety could break or be worn and fail to stop the firearm from firing. The trigger finger should never be inside the trigger guard unless you are actively engaging a target. When the firearm comes off target the trigger finger should come out of the guard. This trigger finger discipline must become completely reflexive.
